

We are launching BRG in a Box for schools and homeschool pods! Due to the current pandemic, we are providing an at home program called BRG in a Box to help young folks continue to cultivate hands on skills and resiliency in a safe manner. Stay tuned to see the full array of projects — from cooking, to sewing, to bike repair.
Get together with your class or homeschool pod and contact us at info(at)buildrepairgrow(dot)org for more information on how to get your own kits!
Today, Charlotte is going to teach us how to use our sewing skills to make a tool organizer using the BRG in a Box Tool Organizer kit. A tool organizer can help you keep track of and transport your tools so that you can do basic carpentry anywhere! Your BRG in a Box Tool Organizer kit includes all the tools, materials, and instructions you need to follow along with this video and put your own canvas tool organizer. You can find the written instructions at the bottom of this post, following the video. If you need a refresher on how to thread a needle and do a backstitch, check out our blog post on foundational sewing skills.
Written Instructions:
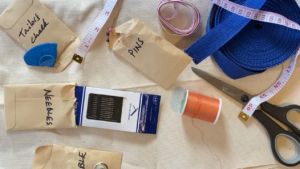
Materials & Tools
– scissors
– pins
-needles
-measuring tape
– tailors chalk
– thread (heavy duty is better)
– 1/2 yard fabric
– webbing (optional)
– a thimble (optional)
Canvas or denim works great! Something heavy duty will hold up better than lightweight fabric.
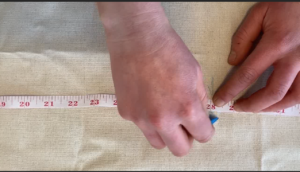
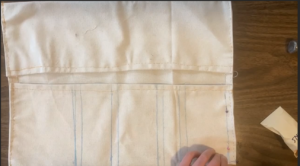
Step 1
Measure & Cut
I cut the fabric into a rectangle at 20″ w x 28″ high, with a 1/2″ seam allowance on all sides.
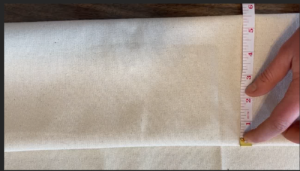
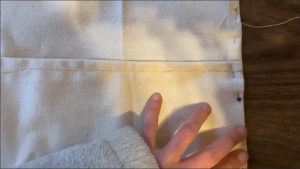
Step 2
Measure your pocket folks
One fold is 5.5″ deep, the other is 6.5″ deep.
Leave 1” of space between the pockets
Mark where your pockets will be using tailors chalk
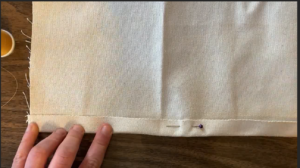
Step 3
Unpin your pocket folds
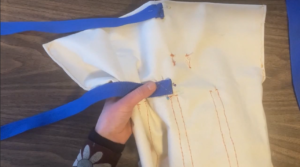
Fold over the 1/2″ seam allowance at the top and the bottom of the fabric
Pin the fold
Stitch along the fold using a backstitch
Step 4
Fold Again…
Pin the left and right sides of your fabric with a ½” seam
Fold your pockets back up. Use your chalk markings to make sure they are in the right place
Carefully pin by pin, pin the pockets in place along the left and right side
Sew the pockets in place using a backstitch
Step 5
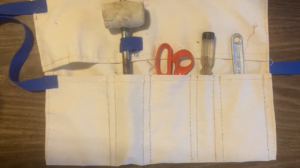
Once you’ve gathered the tools you are going to put in the roll
Plan your layout by placing them along the shorter pocket
Mark out where to stitch using tailors chalk and something with a straight edge
Make sure to leave at least ½” between each tool pocket
Stitch along your chalk line using a backstitch
Step 6
Add a hammer loop (optional)
Mark where your hammer handle lies using tailors chalk
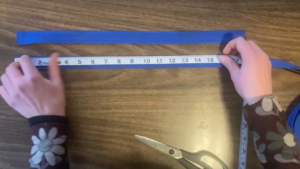
Measure 4” of webbing
Pin it so that it is facing in the opposite direction from where you want it to lie
Stitch it in place
Now fold it over so that the raw ends are placed under
Use a backstitch to secure it in place
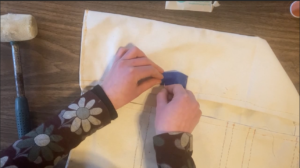
Step 7_a
Make the Tie Straps
The straps are used to tie the roll up.
To make the straps, cut 4 lengths of webbing about 18″ long.
Two of the straps will go along the vertical center of the back, facing right
The other two will go on the left side of the front
Fold over the raw edge and pin one strap in center of the back 7” down and 9.5” in – make sure the long end of your webbing is facing to the left
Fold over the raw edge and pin another one right above 1” down from the top and 9.5” in
Secure using the backstitch to make an X shape
Step 7_b
Flip over your tool holder
Fold over the raw edge and pin your third strap 1” down from the top on the left edge of your holder
Fold over the raw edge and pin your forth strap 7” down from the top on the left edge
Secure using the backstitch to make an X shape
We hope after this project you feel empowered to use your sewing skills, show off your new tool organizer, and do more projects on your own.